In the pursuit of creating a haven, many homeowners overlook the importance of exterior aesthetics. Your home’s exterior is the first impression visitors and passersby have, making it a crucial element in establishing the overall ambiance. One way to elevate your home’s exterior and protect it from the elements is through the application of exterior epoxy coating. In this guide, we will explore the benefits and steps of this DIY project, inspiring you to make your home a solid and beautiful sanctuary.
Understanding Exterior Epoxy Coating
Exterior and versatile solution that not only enhances the aesthetic appeal of your home but also prov epoxy coating is a durable ides protection against weathering, UV rays, and other environmental factors. Unlike traditional paint, epoxy coating forms a tough, resilient surface that can withstand the test of time, making it an excellent choice for both functional and aesthetic reasons.
Benefits of Exterior Epoxy Coating
Durability: Epoxy coating creates a sturdy shield that protects your home’s exterior from harsh weather conditions, preventing damage such as cracks and peeling.
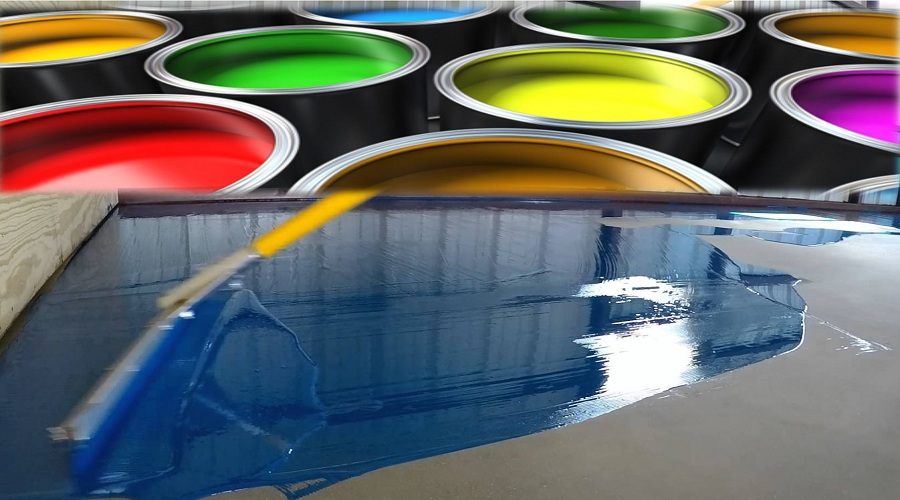
Aesthetics: Available in various colors and finishes, the exterior epoxy coating allows you to personalize your home’s appearance, adding a touch of sophistication and style.
Easy Maintenance: The low-maintenance nature of epoxy-coated surfaces means you spend less time and effort on upkeep, freeing you to enjoy your home rather than constantly maintaining it.
Materials Needed:
Epoxy resin kit (includes epoxy resin and hardener)
Stirring sticks
Measuring cups
Painter’s tape
Drop cloths or plastic sheets
Sandpaper (various grits)
Cleaning supplies (degreaser, mild detergent)
Safety gear (gloves, goggles, mask)
Step 1: Preparation
Clean the surface thoroughly using a degreaser and mild detergent to remove any dirt, grease, or contaminants.
Sand the surface to create a rough texture, allowing better adhesion for the epoxy. Start with a coarse grit and gradually move to finer grits.
Step 2: Protect Surrounding Areas
Use painter’s tape to protect areas you don’t want the epoxy to reach, such as walls or edges. Lay down drop cloths or plastic sheets to catch any drips.
Step 3: Mix Epoxy Resin
Follow the instructions on the epoxy resin kit for mixing ratios. Typically, it involves combining the resin and hardener in specific proportions.
Stir the mixture thoroughly but gently to avoid introducing air bubbles.
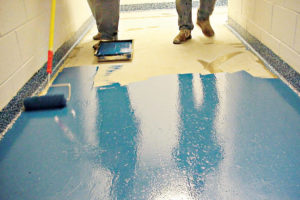
Step 4: Apply Base Coat
Pour the mixed epoxy onto the surface and spread it evenly using a squeegee or roller. Ensure complete coverage.
Allow the base coat to cure according to the kit’s instructions.
Step 5: Sanding (Optional)
If a second coat is desired, lightly sand the cured base coat to promote adhesion. Clean the surface afterward.
Step 6: Apply Top Coat
Mix a second batch of epoxy and apply it as the top coat. This layer will provide a glossy finish.
Use a squeegee or roller again for an even application.
Step 7: Removing Bubbles
To eliminate air bubbles, pass a heat gun or propane torch lightly over the surface. Be cautious not to overheat or scorch the epoxy.
Step 8: Cure and Final Inspection
Allow the epoxy to cure completely based on the kit’s recommendations. This may take several days.
Inspect the surface for any imperfections. If needed, sand lightly and apply an additional coat.

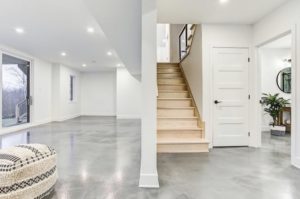
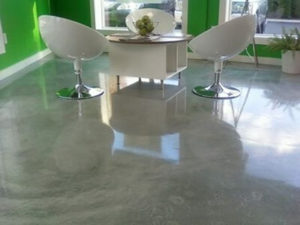
Epoxy Exterior Ideas to Inspire Your
Now that you’ve grasped the benefits and steps of exterior epoxy coating, let’s dive into some inspiring ideas
Home Improvement Websites: Explore websites like Pinterest, Home Solid Home, Instagram, and home improvement forums. Search for terms like “outdoor epoxy projects,” “epoxy garage floors,” or “epoxy outdoor furniture” to find a variety of images and ideas shared by DIY enthusiasts and professionals.
Check out home improvement websites and blogs. Many DIYers and home improvement experts share their projects with step-by-step guides, photos, and tips. Websites like Houzz and DIY Network often feature user-contributed projects.
YouTube Tutorials:
YouTube is a great resource for visual inspiration. Search for epoxy exterior projects and watch video tutorials from experienced individuals or professionals. They often provide insights into the process and share their experiences.
Local Contractors and Artisans:
Connect with local contractors or artisans who specialize in epoxy applications. They may have portfolios showcasing their previous projects. You can find such professionals through online directories, social media, or by asking for recommendations from local home improvement stores.
Home and Garden Shows:
Attend home and garden shows in your area. These events often feature displays by contractors, artisans, and manufacturers showcasing their latest projects and products. You can gather ideas and get in touch with professionals directly.
 Conclusion:
Elevating your home’s exterior with exterior epoxy coating is a rewarding and achievable DIY project. By understanding the benefits and following the simple steps outlined in this guide, you can create a solid and beautiful home that stands the test of time. Make your home a haven with a durable and aesthetically pleasing exterior – where you can truly say, “Home Solid Home.”